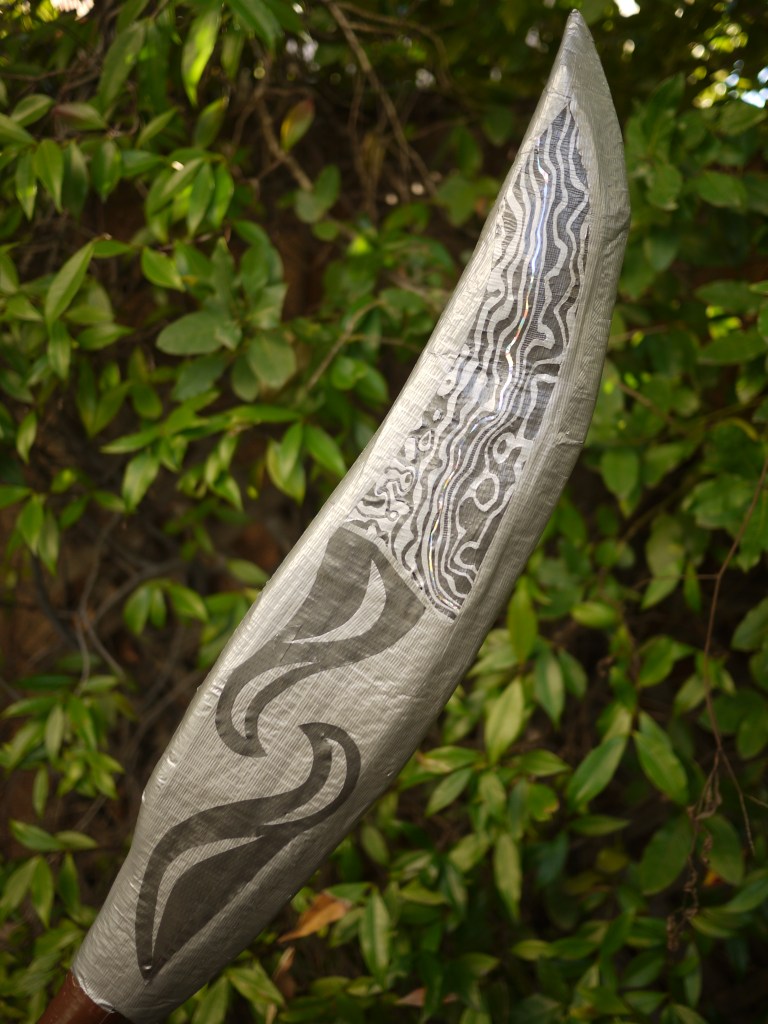
One of my most intricate accomplishments of duct tape crafting. Requested by a player whose brother is a blacksmith who crafts real Damascus Steel. With an added line of crystalline in the middle, which really pops in the sunlight.

The term “Damascus Steel” is used in a variety of ways, many of which differ from the crucible steel to which the term was first applied. It now often refers to Pattern Welding, in which metals of different compositions are forge-welded to create different patterns.
The difficulty here is much more challenging than might be readily apparent. There are a bunch of other designs you can see around the site that involve fine details, but this one is unique because it requires so many closely spaced meandering lines of alternative colors. If I just set one color as the background and laid the other one on top, it would be very fragile, since any part of the meandering line could be caught or snagged or rubbed against and it could get dislodged or torn apart. This was a source of some consternation for me for some time, but eventually I took a shower and thought about it (my usual method of problem-solving) and came up with a solution.

Each “layer” of the pattern (for example, one single carved line of darker grey duct tape) is held down under the layer to one side, but itself is above the layer to its other side. In this way, the whole design is held together like tiled shingles on a roof. None of the layers extends much past where it’s visible, so that the whole thing is never more than a few layers thick at any given point.

This entire layering system is done while carving out the shape of each individual layer. I start with the one on top, then peel it back (keeping it anchored to a hinge attached to the cutting board so that it can be replaced into exactly the same spot), then the next layer is laid down underneath it. The paper-printed image of the pattern I’m carving through is attached to the cutting board on the other side, so that it can be folded back and replaced, as well. Each time a layer is complete, you fold up everything done so far, place down the next layer such that it only slightly underlaps, then fold everything down back again on top of it, and repeat.
In addition to that, the crystalline in the middle had to be underneath the layers on either side, so there is a special arrangement there that requires exactly one of the darker lines to be on top.

The overall shape of this boffer is a glaive, a pole arm like a spear with a much longer cutting edge mounted on the end of the pole.
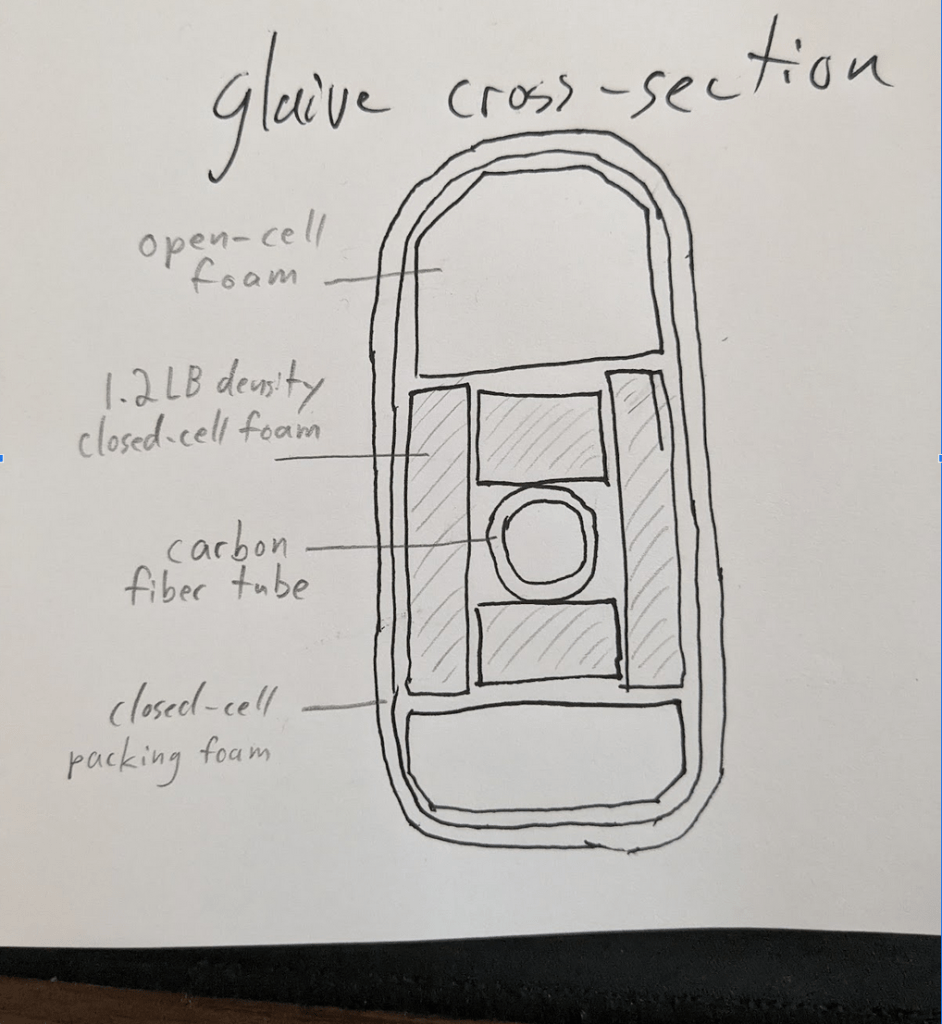
The core is a 10-mm carbon fiber tube. The handle is made with 1/2-inch PVC insulation foam (closed-cell polyethylene). In the blade, there’s a layer of closed-cell foam around the core, then on each edge there’s open-cell foam to give it additional padding and squishiness, then all along the exterior there’s a thin layer of closed-cell foam again (packing foam from Lowe’s) to give it a smooth exterior that provides enough structure to the outside that the duct tape doesn’t pinch itself, while being flexible enough that the open-cell foam beneath it spreads to absorb force and gradually decelerates.
All in all, one of my finer pieces!