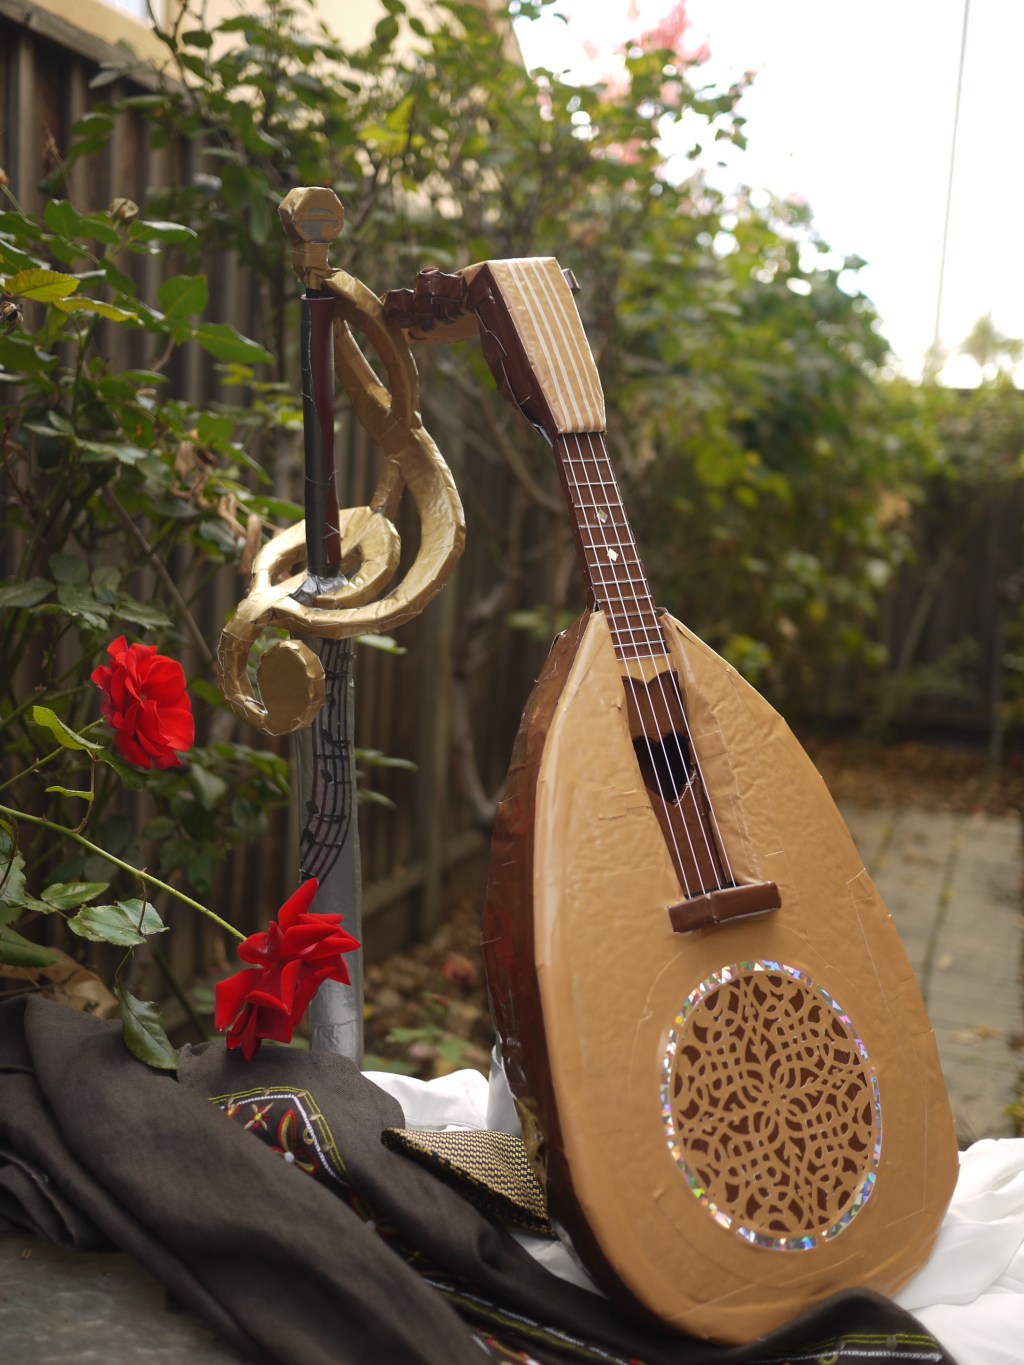
I use a technique I’ve called Composite Foam to achieve particularly lightweight and safe boffers! Here’s a page about what I mean by composite foam, along with a list of the materials I most commonly use.

This technique is more difficult, in the sense that it requires a higher level of precision, than the traditional method of boffer crafting used in compatible leagues. It yields a lighter, faster blade, but probably takes longer to master and has a higher skill floor. Also note this guide does not cover all aspects of a complete boffer build, only the materials and the blade-building aspects that are different.
Materials
Core
I believe carbon fiber is the best material available for boffer cores. Compared to similar dimensions of fiberglass cores, it is lighter-weight and bends less, which allows the creation of boffers that are longer, lighter, or both.
The question is cost-effectiveness. For boffers that aren’t going to face especially heavy hitting, pulltruded meter-long 8mm-external-diameter tubes, $10.99 each from RMRC, work fine and survive well. Using tubes minimizes flex while keeping weight low. This works wonderfully for people whose dueling styles involve light or medium force, and is the type I use most frequently.
Alternately: If you’re someone whose style involves hitting harder, or if your boffer is going to be frequently hit by people who do, and you want the weapon to be a meter long, you might need to use different cores, or else it’ll eventually build up enough microfractures to risk breaking. A few options here. You could try solid 6mm or 8mm diameter rods rather than hollow tubes, although the added weight would necessitate more padding. Or you could use larger-diameter tubes to give some more structural stability, such as 10mm or 12mm, with, accordingly, some wider foam. Or you can use roll-wrapped tubes rather than merely pulltruded tubes, which may have greater ability to resist breaking force. Rock West Composites has options for this, although their website is pretty tricky to search through since only some of their tubes can be bought individually. I’ve tested their two-meter roll-wrapped tubes for polearms and they seem good, but the relatively inexpensive ones seem to now be out of stock.
Closed-cell foam
For parts of the boffer that need to absorb more force more quickly, or just otherwise be sturdy or hold specific shapes. I’ve been using 1.2LB Polyethylene foam from The Foam Factory ($9.99 for a 108″x24″x0.25″ sheet), which is lower-density than camping mat foam. I use their 1/4″-thick sheets for the side pieces of most of the composite foam blade designs. For structural and decorative components such as pieces of the rapier hilts, or for non-composite blades, I use 1/2″-thick sheets of either the 1.2LB density foam or the 2.2LB density foam.
Open-cell foam
For parts of the boffer that absorb force, but can be thicker than half an inch, I use this even-lower-density foam so that there’s not more weight or rapid deceleration than there needs to be. I use 2-inch-thick, 22-inch-by-22-inch blocks from Home Depot, where they’re $9.88 each. In basic blade designs this is only used at the tip of the boffer, but I tend to add this along edges of blades as well (see examples below).
Packing foam (thin sheets)
One of my discoveries has been the many applications of the very thin sheets of closed-cell foam sold as Packing Foam at Lowe’s, where you can get a giant roll for $15.98 or smaller 1’x1′ pouches for much less.
Duct tape
In the leagues I’ve been making boffers for, the standard is for the external layer to be duct tape, which is essentially a layer of extremely thin plastic of any color you want, on top of a layer of fabric that is sturdy enough to hold things in place while being easy to cut, and then a layer of adhesive that is strong enough to stick to things firmly while still being possible to peel off. I am sentimentally attached to the 3M duct tapes, but the Duck Tape brand is also fine and has many colors. IPG sells a standard silver Utility Grade duct tape that’s even thinner than usual, which I sometimes use as the outer layer on blades to further reduce impact. IPG’s Fix-It Grade duct tape is the standard for many leagues, and is now what I use for most of my blades.
Tools
Not much required. I just use a cheap cutting board, markers to keep track of stuff, a printer, scissors, and a utility knife. I use the trapezoid blade for carving patterns in tape, and a snap-off blade for carving larger foam. (Edit: I now also have a crafting mat.)
Composite Foam Design Reasoning
The reason I’m somewhat obsessed with making boffers as light as possible isn’t just because I’m a bit of a nut about safety, it’s also because of the physics of the situation.
Fundamentally, the goal of all the foam around the core is to (a) decelerate the boffer as gradually as possible when it strikes someone (the same reason it is good for cars to have crumple zones), and (b) spread the force out over a larger area (the same reason you can lie on a bed of nails but not on, y’know, a single nail), so that the amount of force being exerted upon any given part of a human at a time is low.
In the same volume, denser foam is heavier, by definition. Using foam that’s denser than necessary makes the boffer heavier (and makes it hit harder). And, crucially, making the blade heavier in one place then requires every part of the boffer to have slightly more foam, since a heavier boffer requires more padding to decelerate, which then requires more padding to decelerate.
(Somewhat related to the Tsiolkovsky Rocket Equation, which points out that in order to lift something larger to orbit, you need more fuel, which means you need more fuel to lift that fuel, etc. So lifting an additional pound to orbit requires way more fuel. Okay, it’s not overly similar, but I’ll take any excuse to talk about space exploration and rocketry.)
So, in theory you would want to use foam that is just stiff/dense enough that it fully decelerates the boffer. With light cores, this could mean purely using the squishy open-cell foam. In practice there are a couple of problems with that. The first is that duct tape will pinch itself and get all sorts of unpleasant creases if it’s put directly on top of squishy open-cell foam. The other is that if the boffer is heavy enough, you might want closed-cell foam up against the core just in case someone hits harder than you’re expecting.
The solution is the Packing Foam (listed earlier) as a wrap around the exterior of the foam, which, when the boffer is not in contact with anything, maintains a nice structure so that the shape of the blade is maintained, and when the boffer hits something provides enough of a backing for the duct tape that you don’t have to worry about it gaining weird creases.
I often also add a layer of closed-cell foam against the core, as well, if the total blade is heavy enough that it’s possible for someone to (perhaps accidentally) hit overly hard with it and push through to the core. As shown in the glaive examples.
So for larger builds like glaives I’ve got a layer of closed-cell foam both against the inner core and at the edge, with lower-density open-cell foam filling the rest of the space. The result is a blade that is lighter, faster, and safer.
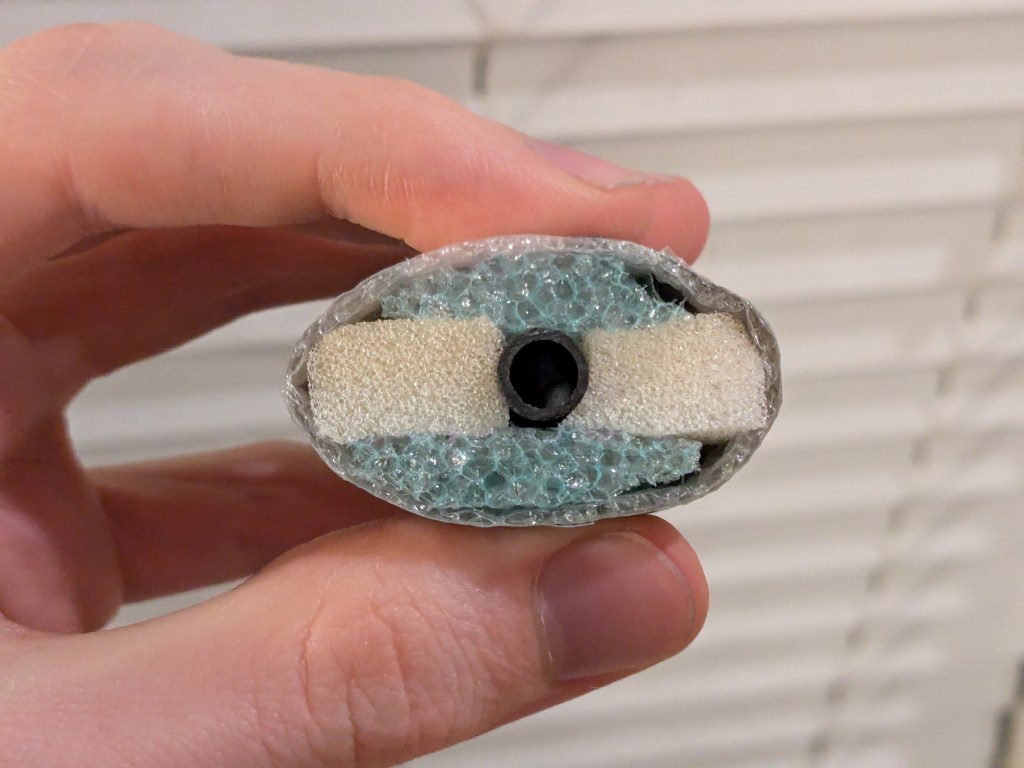
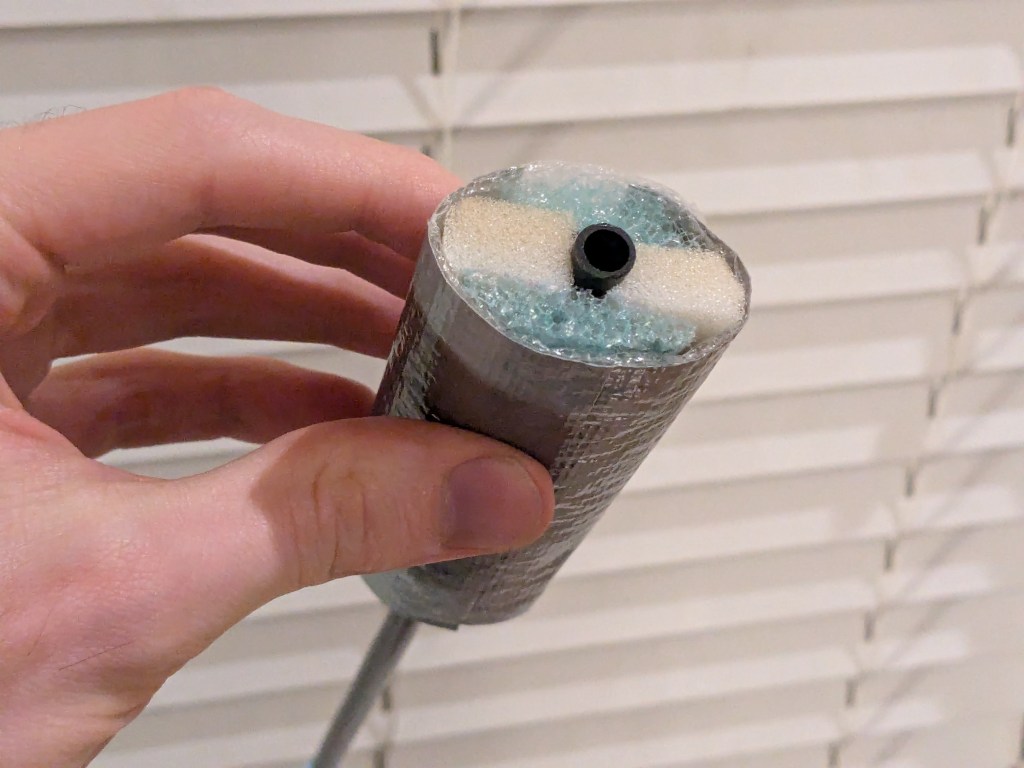
Cross-Section
Three-foam composite blade cross-section design
This is the system I’ve settled on for most of my composite-foam blades. It uses:
- Open-cell foam (very light and soft) adjacent to the core in the direction of the striking surfaces. Light yellow in the pictures.
- Closed-cell foam (still low density, but not as light as the open-cell foam) adjacent to the core along the sides of the blade. It doesn’t just help cushion from the sides, it also gets in the way when the blade impacts from the striking surfaces, and the more the impact pushes in, the more it gets involved in resisting that impact. Green in the pictures
- A surrounding layer of thin closed-cell foam around the entire piece. This is really important component for several reasons, as it keeps all the inner foam in place and holds the duct tape in a consistent shape while allowing the blade to deform and spread out the force of the impact. It also adds to the padding, since it’s an additional layer of foam.
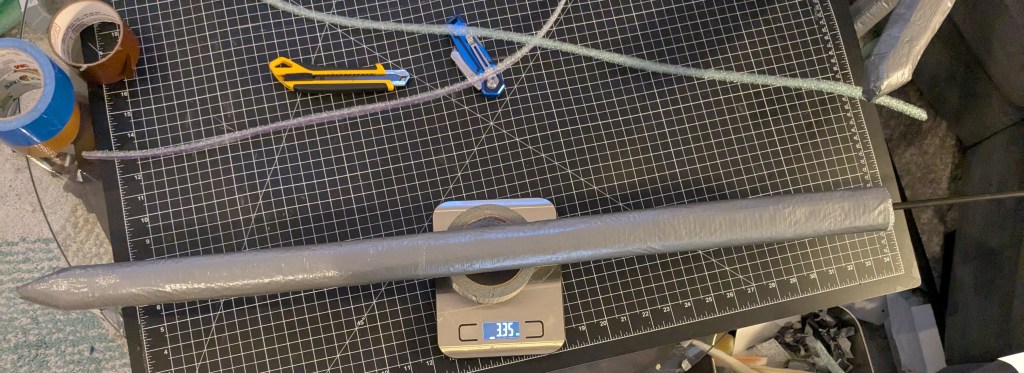
This works for these blades because they’re so light, the whole blade part of the boffer being a couple of ounces. The meter-long core is about one ounce by itself. With the blade added on, including all the layers of foam and the duct tape, it’s between 2.5 ounces and 3.5 ounces depending on how wide the blade is. See below, with the scale measuring in ounces:

If you used a heavier core and/or heavier foam, you’d need to use more foam to slow down the impact. And, of course, I’m not showing every single step involved since this guide is already pretty long, but I also securely tape at least the 1/4″ closed-cell foam to the core to increase its ability to resist compression from either striking surface.
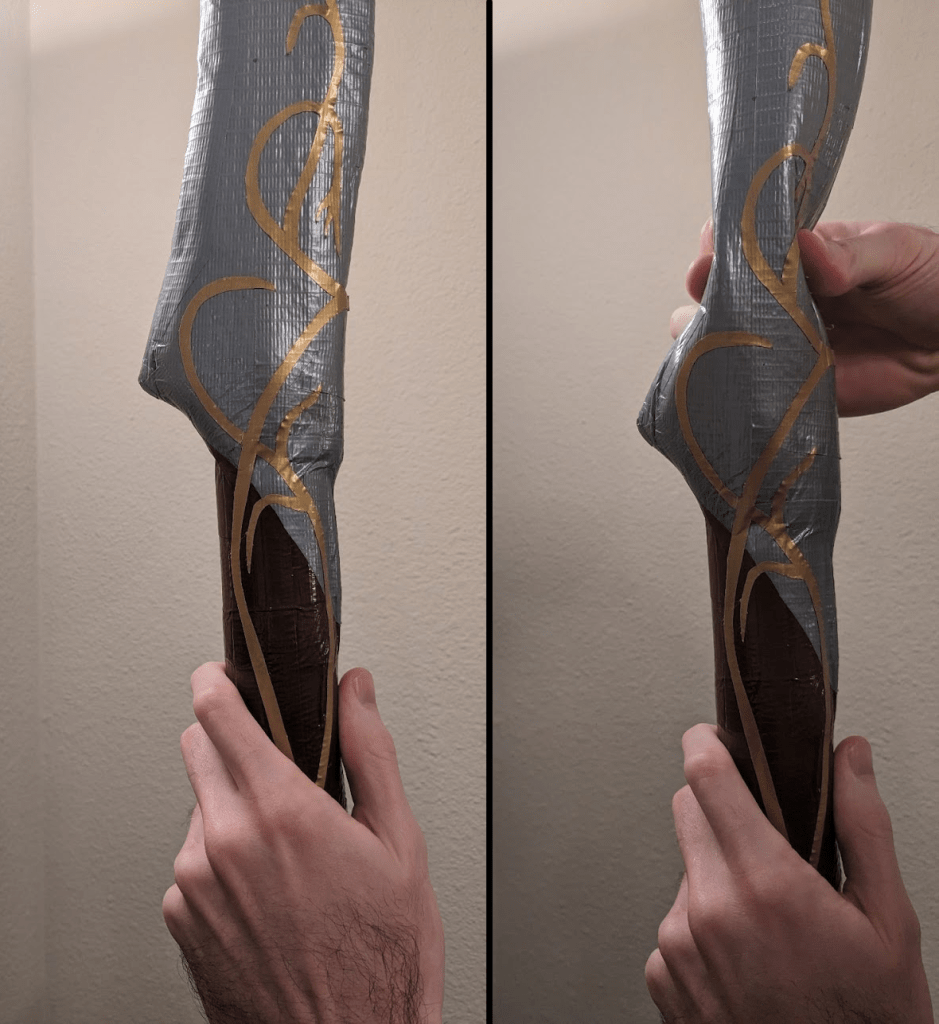
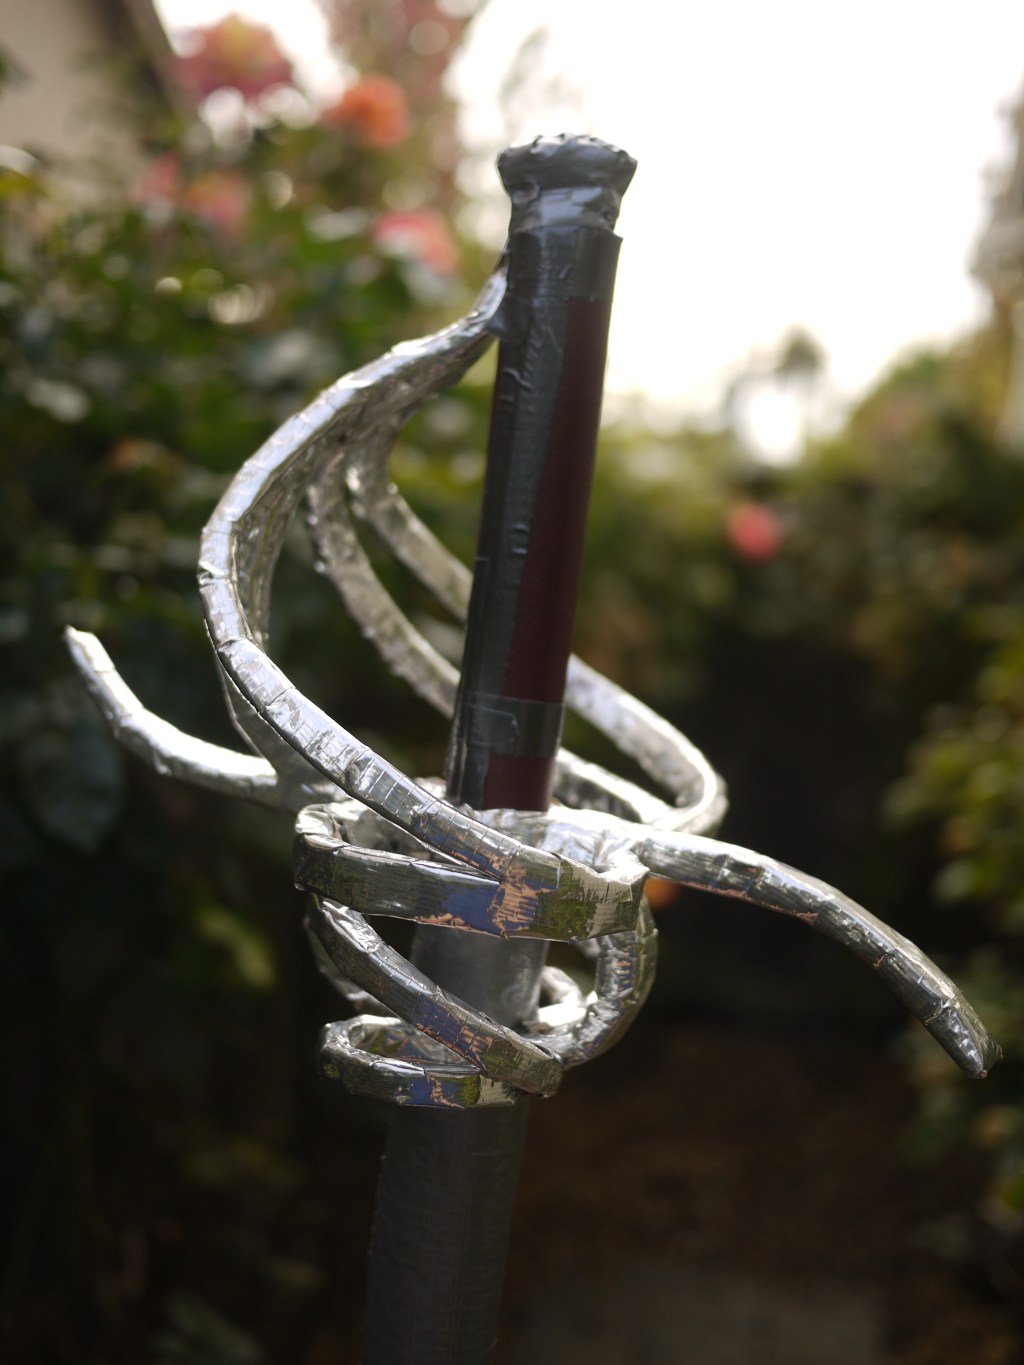
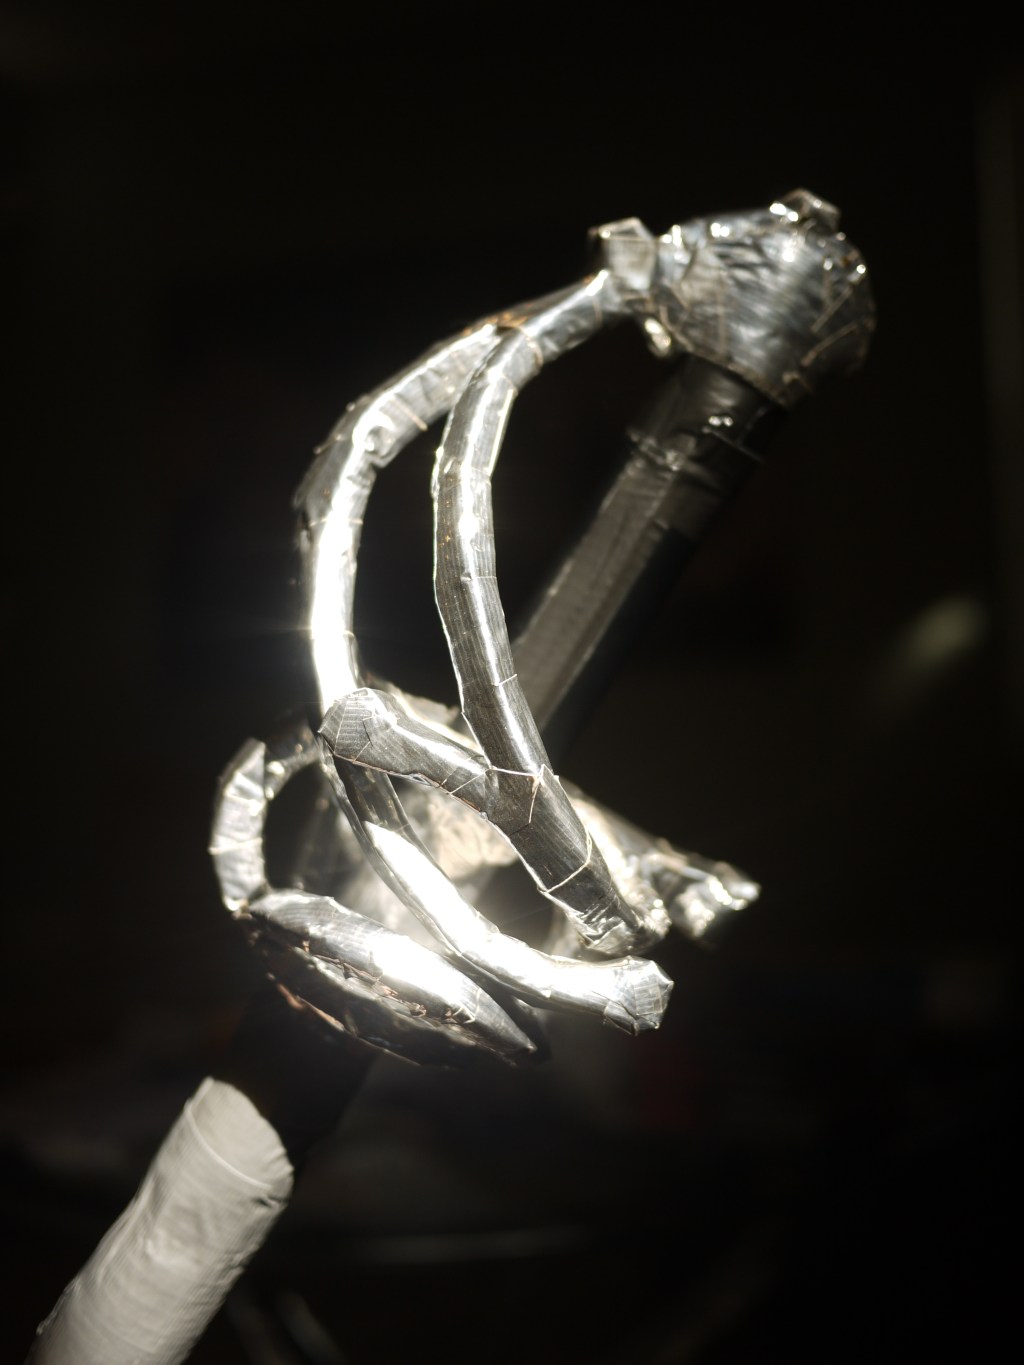
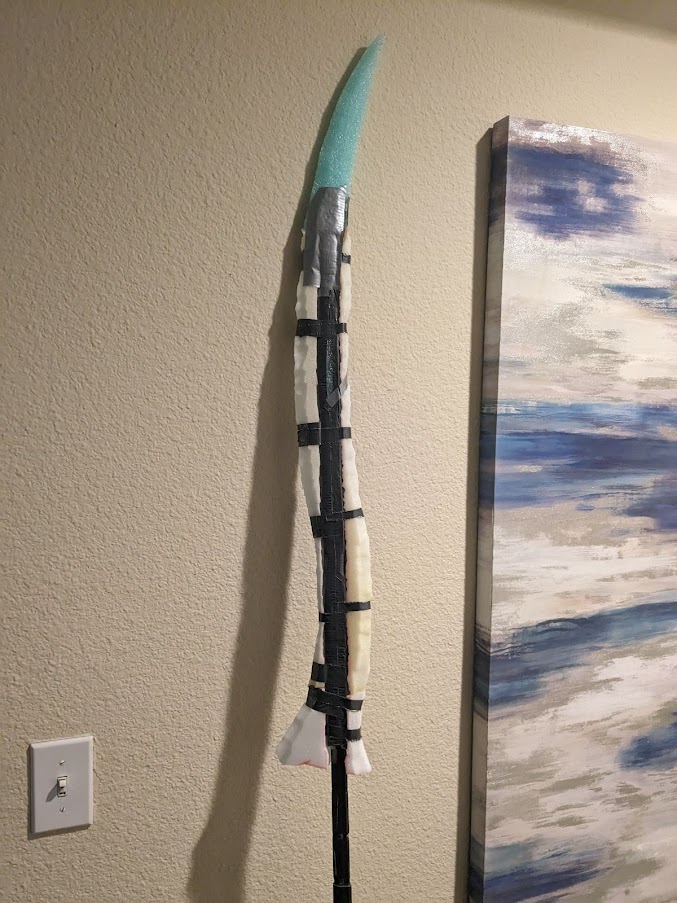
Example: Silvered Swords of Hermes
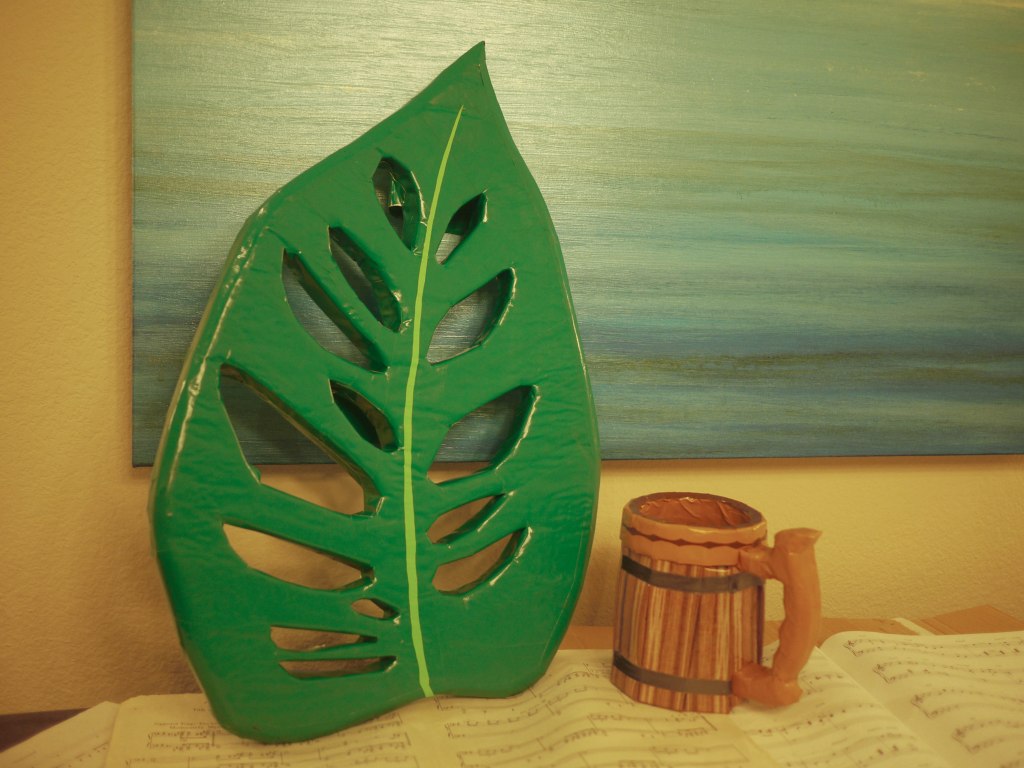
From this post, here’s another example of a cross-section of a combination of open-cell foam, low-density closed-cell foam, and a surrounding layer of thin packing foam. (This is also the design used for the Music Sword)
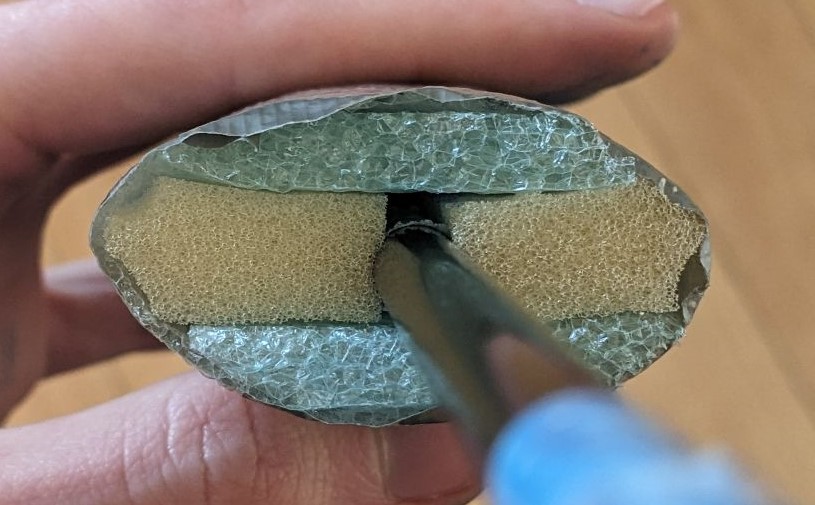

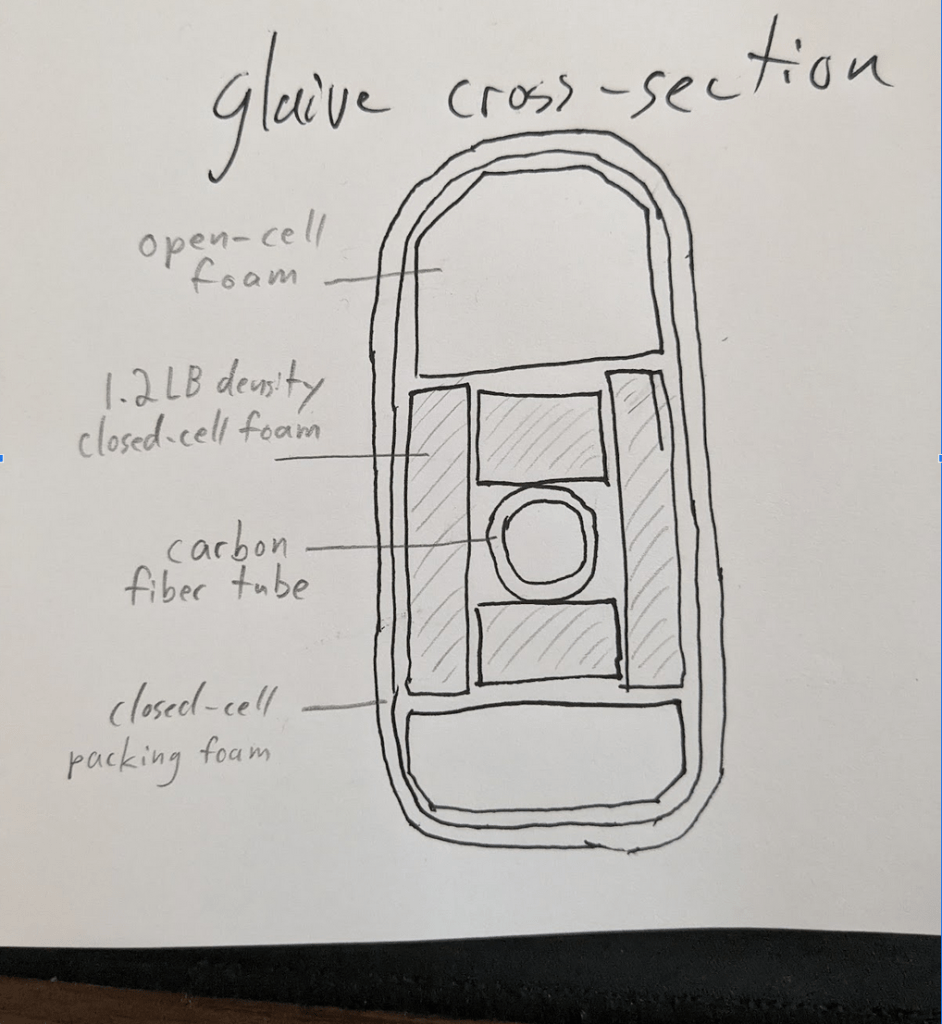
Glaive blade
Here’s a diagram I drew to show the different pieces. In this case, I wanted even more closed-cell padding around the core, to be safe.
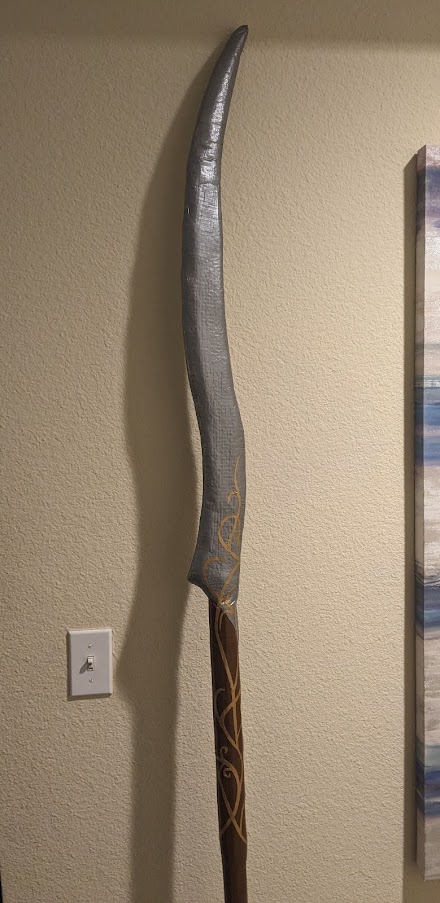
When you pinch the blade, first you feel the closed-cell shell around the outside maintaining the shape, then you feel the lightweight foam underneath which fills out the structure, then partway through you start to feel the closed-cell foam around the core which ensures that all is safe. The contiguous layer of closed-cell packing foam around the entire exterior gives the shape a lovely smoothness, adds to the padding, and spreads out the force of any impact.